Make your own DIY wood shelves under $50 with this easy project that anyone (yes, anyone) can do.
This post may contain affiliate links, which means I’ll receive a commission if you purchase through my link, at no extra cost to you!
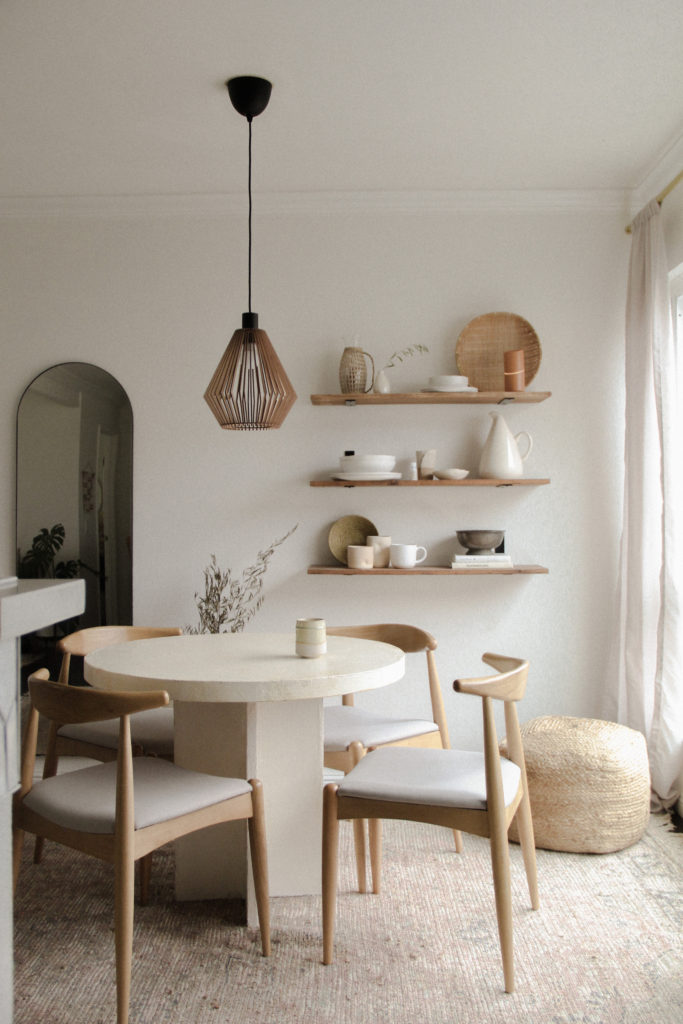
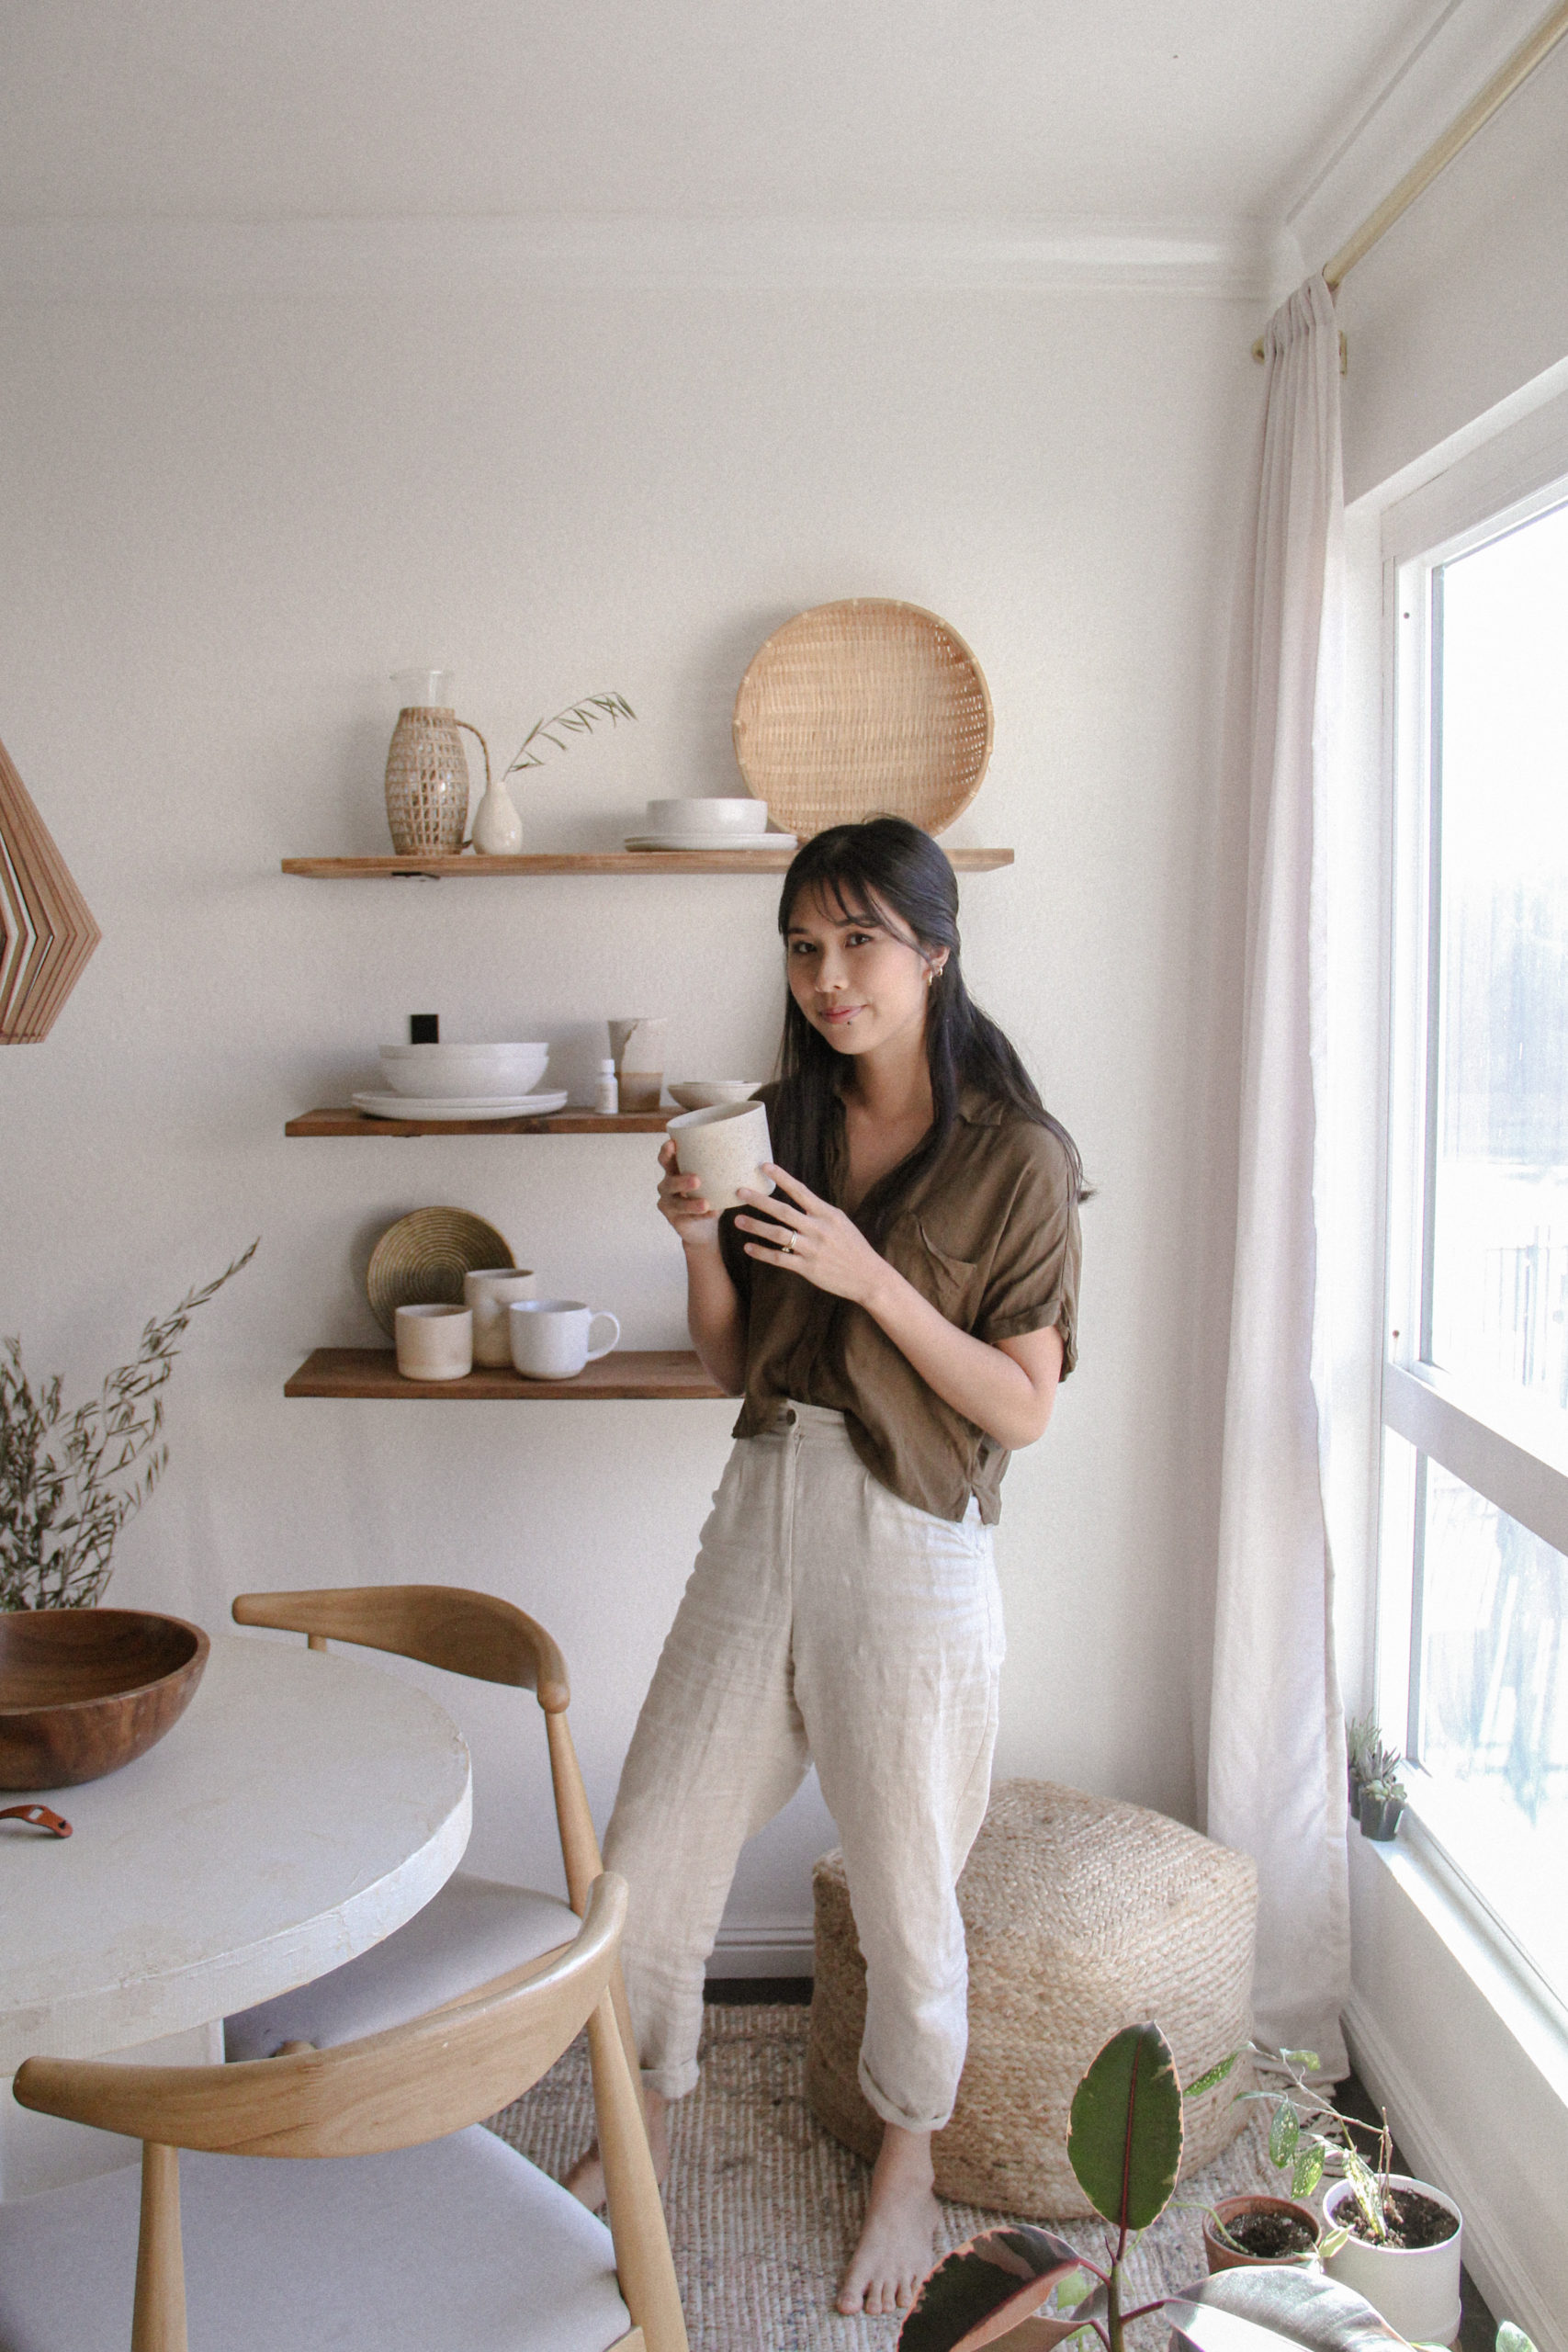
Listen, long gone are the days when we pay upwards of $200+ just to have a nice sturdy set of shelves. These pieces of pine were wasting away in the back of the closet–– so I turned them into my dream desert-inspired shelves.
You’ll need:
Materials:
+ pine wood (you can grab a long 9 or 10 ft piece at your local hardware store for under $20!)
+ wood pre-stain (I used this one)
+ your wood stain of choice (I used Special Walnut by Varathane)
+ shelf brackets (mine are from Amazon, you’ll need to get wall anchors separately!)
+ sandpaper (or an orbital sander)
Tools:
+ a drill (this is the set I have, which is great for beginners!)
+ a level
+ a stud finder
1. Start your DIY wood shelves with pine pieces in your desired length.
If you’re a renter, live in a small space, or don’t have your own power tools or saw, ask your hardware store to cut your pieces there. Typically the first couple cuts are free, with an additional small fee per additional cut.
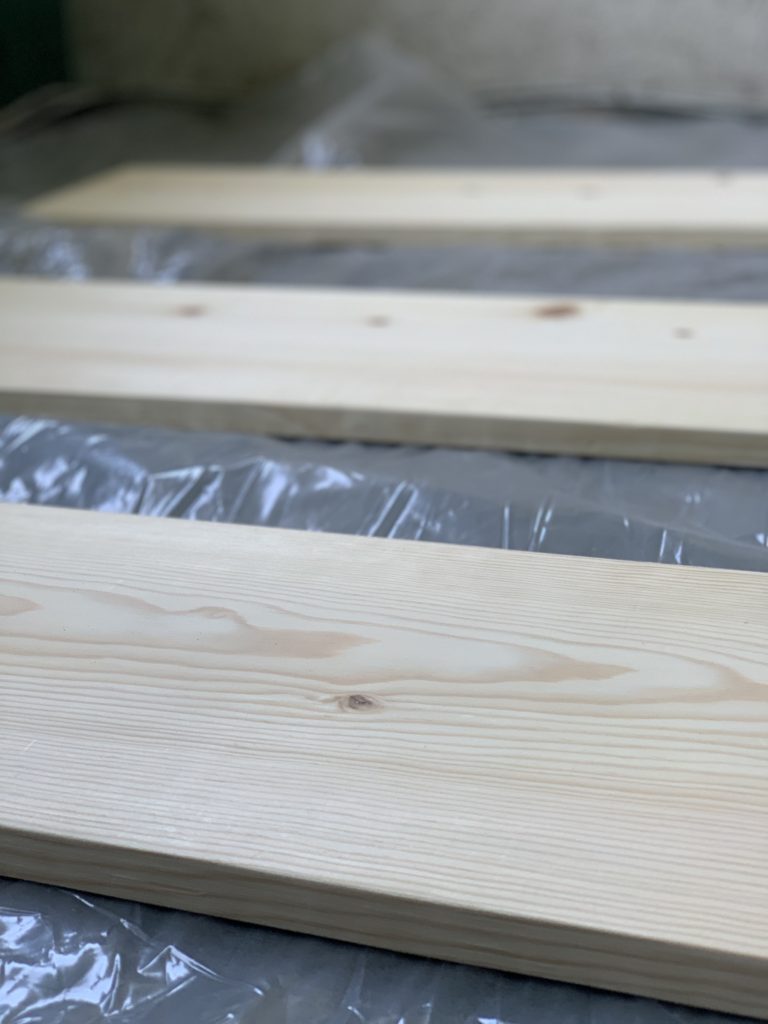
Ours are cut it into three equal pieces measuring 3’ x 9” with a thickness of 0.75”.
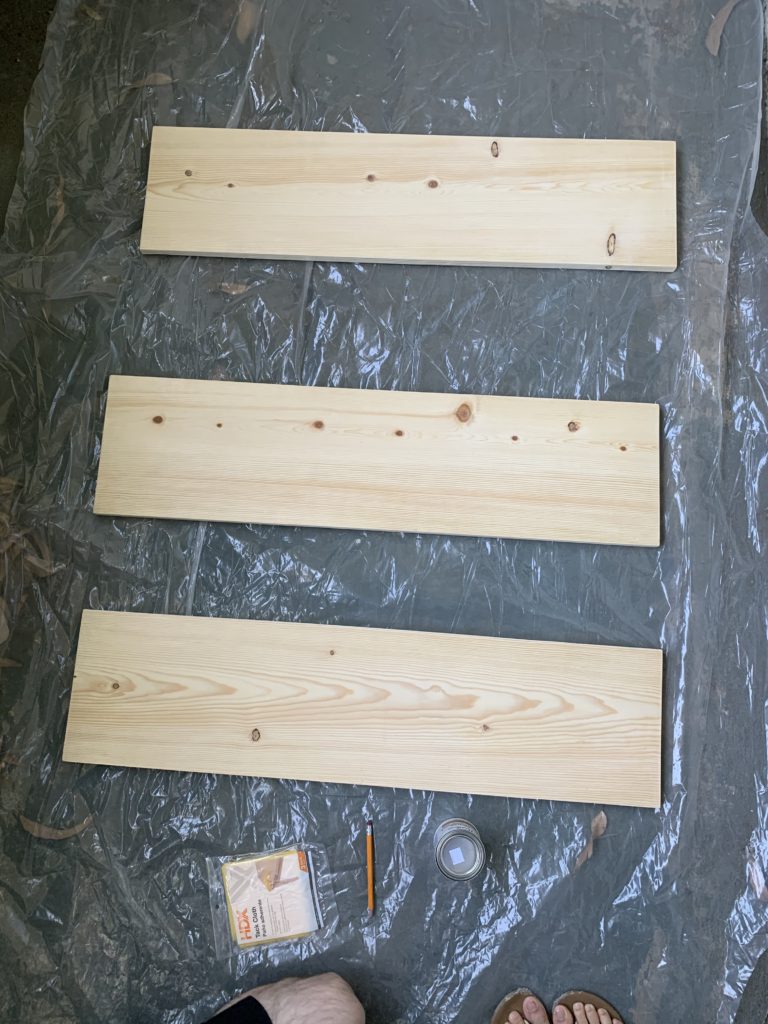
2. Sand down your shelf pieces.
At the time I was on a tight budget so instead of using an orbital sander, I picked up a piece sheets of sandpaper and made sure to sand down any unevenness to soften the surface and corners. Doing an even job here is crucial to the stain application!
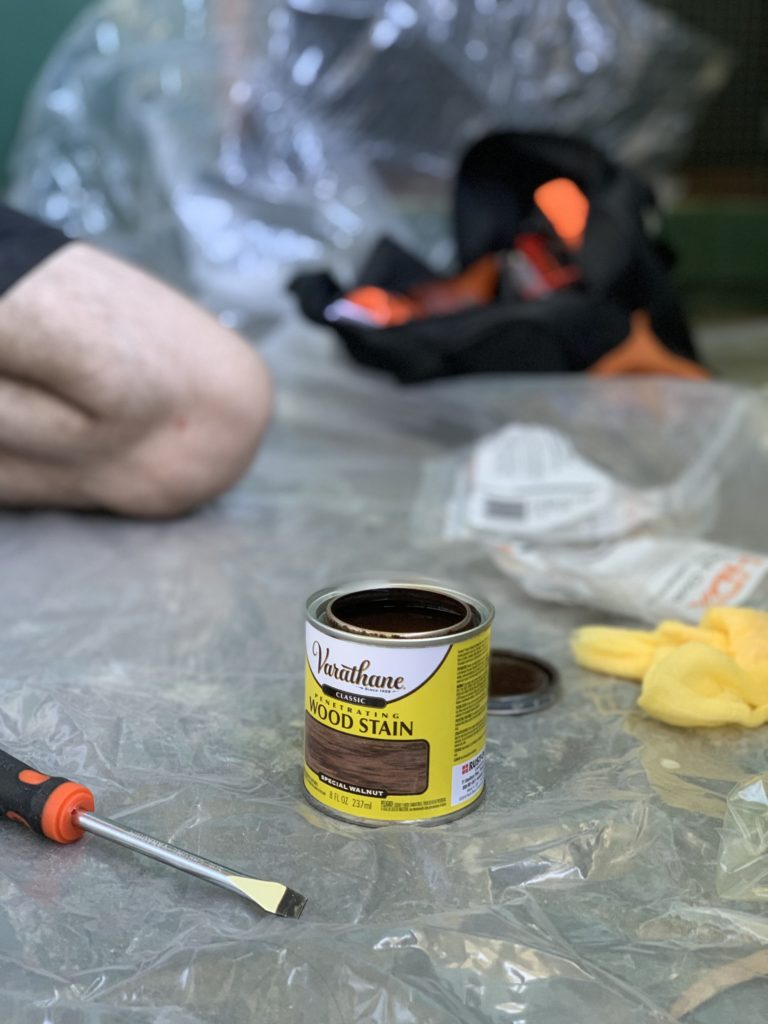
3. Apply a layer of pre-stain.
We used this one by Varathane. Applying pre-stain helps prevent blotchiness and allows the stain to apply more evenly. I’d highly recommend this!
4. Stain your DIY wood shelves.
Time to stain! We used Special Walnut by Varathane and wiped it off quickly with a paper towel after each layer to keep the stain from absorbing too much. We did about two layers on each side, letting them dry for several hours between layers.
5. Time to install your DIY wood shelves.
Having installed several shelves over the last two years, I keep coming back to my favorite method, which is to
1) attach the brackets to the wood first and then
2) locate wall studs (if you desire to install them to a stud, which I highly recommend), and
3) hold the shelves to the wall and place the level on the wood, and using a pencil to mark the final bracket holes.
A video might be better at explaining this, so click here for my Instagram Reel!
Now, style and enjoy your new shelves!
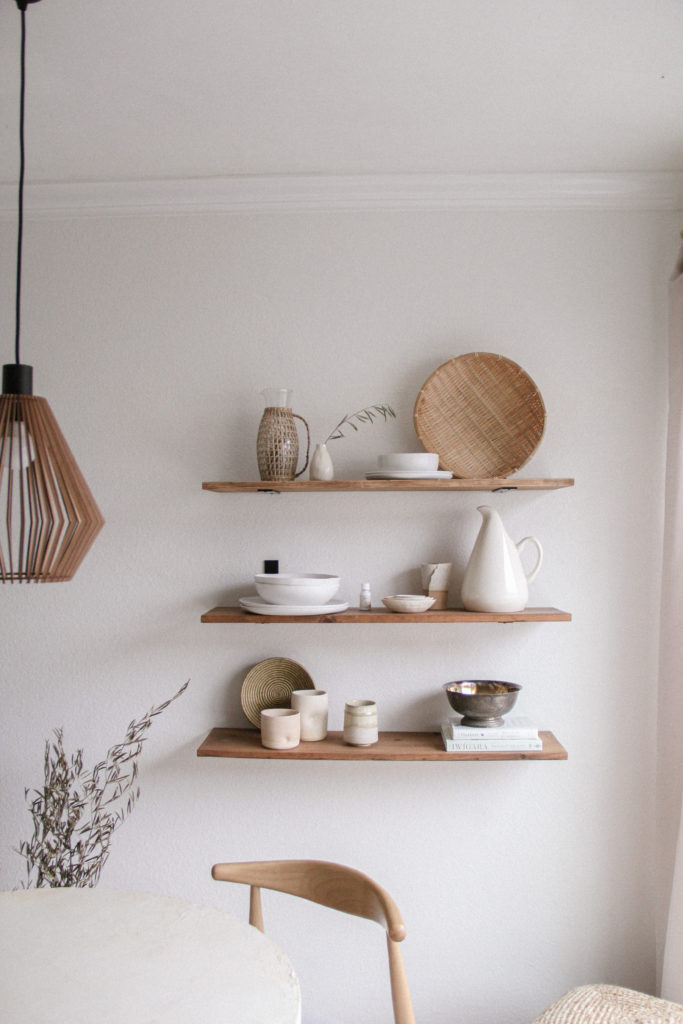
These shelves were the very first DIY project I ever did, so they mean so much to me! I’m too embarrassed to share the first iterations of these shelves 😅 and I put them away in the closet while I rotated through about five other wall options in this room over the last two years. I finally brought them back out recently and they bring me so much joy again!
I hope they do the same for you.
xo, rach
p.s. I love sharing DIYs here on the blog! Check out some other ones here.